Create Model
Model is one of the cornerstone feature of Cortex. Through model, we provide a set of powerful tools with rich features to you to load, configure, customize and deploy machine learning algorithm and its entire workflow in one seamless drag-and-drop visual editor.
Cortex also allow you to save, undo and redo model configuration for future deployment. Therefore, you will be able to test and compare multiple models before deploy and publish it organization wide.
Before we start creating model, it will be beneficial we introduce some terms and its definition:
- Model
- Pipeline
- Node
Model
In Cortex, model is an entity to group a set of well defined functional processes such as data source, data processing, labelling, machine learning and visualization into a cohesive workflow.
Currently, Cortex support two type of models:
- Data modeling
- Image modeling
Features available on model are:
- Save - save model state to backend
- Setting - configure parameters for environment the model will operate in
- Undo - discard current action, revert previous state
- Redo - repeat current action
Pipeline
Machine learning pipeline groups nodes into to single entity. A pipeline is made of nodes which have an expected input and output type.
A pipeline should perform one distinct function. This is to help the user to abstract low level and detailed functionalities into a higher level abstraction therefore, higher level abstraction can assist user to construct sophisticated machine learning workflow.
Pipeline can be used to map common machine learning techniques to be distributed and share with other collaborators.
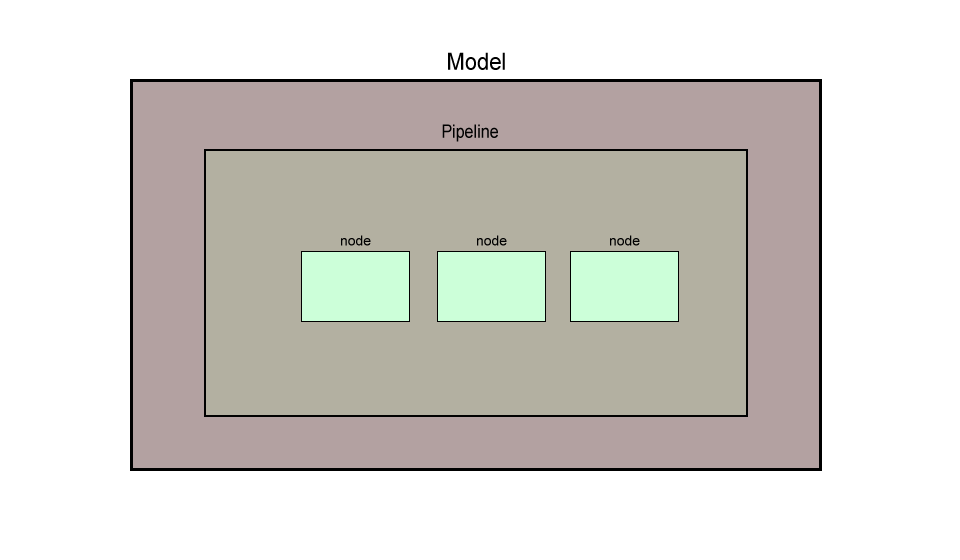 Node
Node
A node generally represent a single, distinct functional entity. They are usually input, output and algorithm. Each node will fall into one of 6 categories
- Data input - input source e.g file, database, social media, email and etc.
- Data processing - manipulation and clean up of data before they are forwarded to machine learning algorithm to be processed.
- Labelling - annotate and label missing value
- Splitting - categorize data into different buckets for testing and training
- Machine learning - algorithm that performs specific task in matching input data against ML model to produce an accurate output
- Visualization - displaying best chart type according to data supplied
Nodes fit together in a sensible way with input and output to produce result.
Create Model
Click/expand left navigation bar to reveal the analytics menu. There are two types of analytic modeling available:
- Data modeling - processes structured data from database and other data source where data are generally fit into certain pre-defined format.
- Image modeling - processes image and video stream.
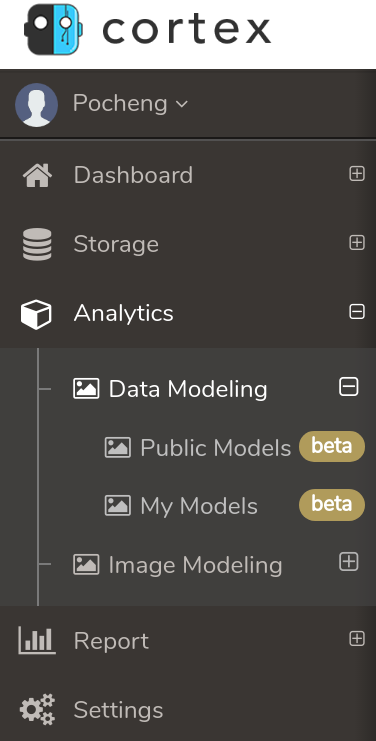
Click on one of the data modeling tab. It has two sub menus underneath
- Public Models - accessible to public
- My Models - only accessible to you.
Create a model
To start creating a model, we recommend you to create under your own sandbox in My Models, first.
Click My Model.
![]()
Click on Create New Model. Below Create New Model dialog box will appear.
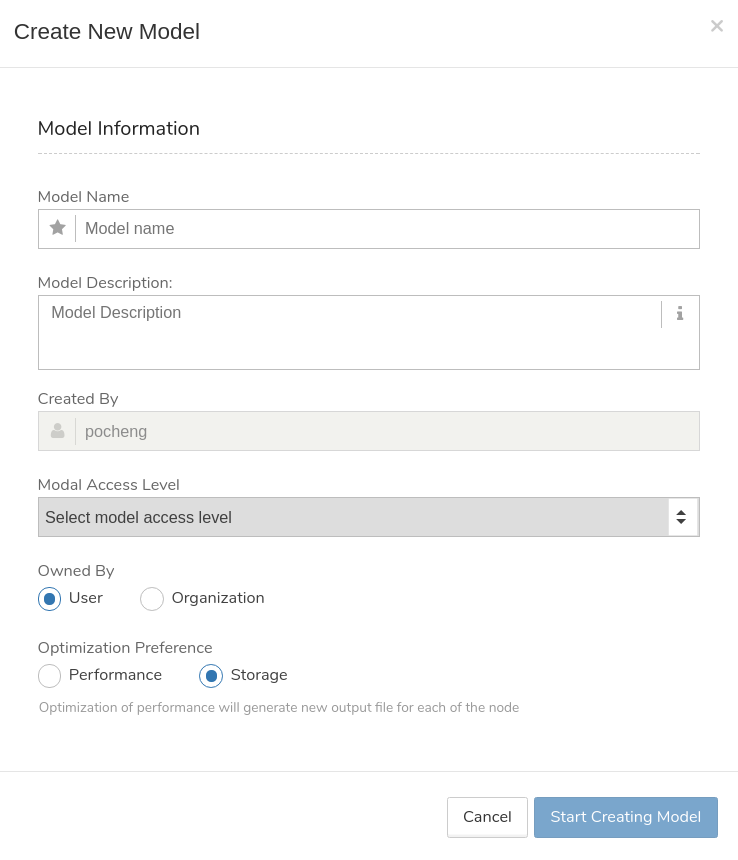
| Field | Description |
|---|---|
| Model Name | Assign a short name to represent your model |
| Model Description | Give a longer description to explain the purpose of this model |
| Created By | Who create this model. This should be assign to you by default. |
| Model Access Level | Public - visible to everyone |
| Private - visible to you only | |
| Organization - visible to everyone in your organization | |
| Owned By | User |
| Organization | |
| Optimization Preference | Performance - node will generate output file to be store in system storage; thus speed up performance |
| Storage - node will recycle system storage to conserve space |
Click Start Creating Model. Model been created as shown below:

Click on the model tab, a dropdown content page will be shown:
![]()
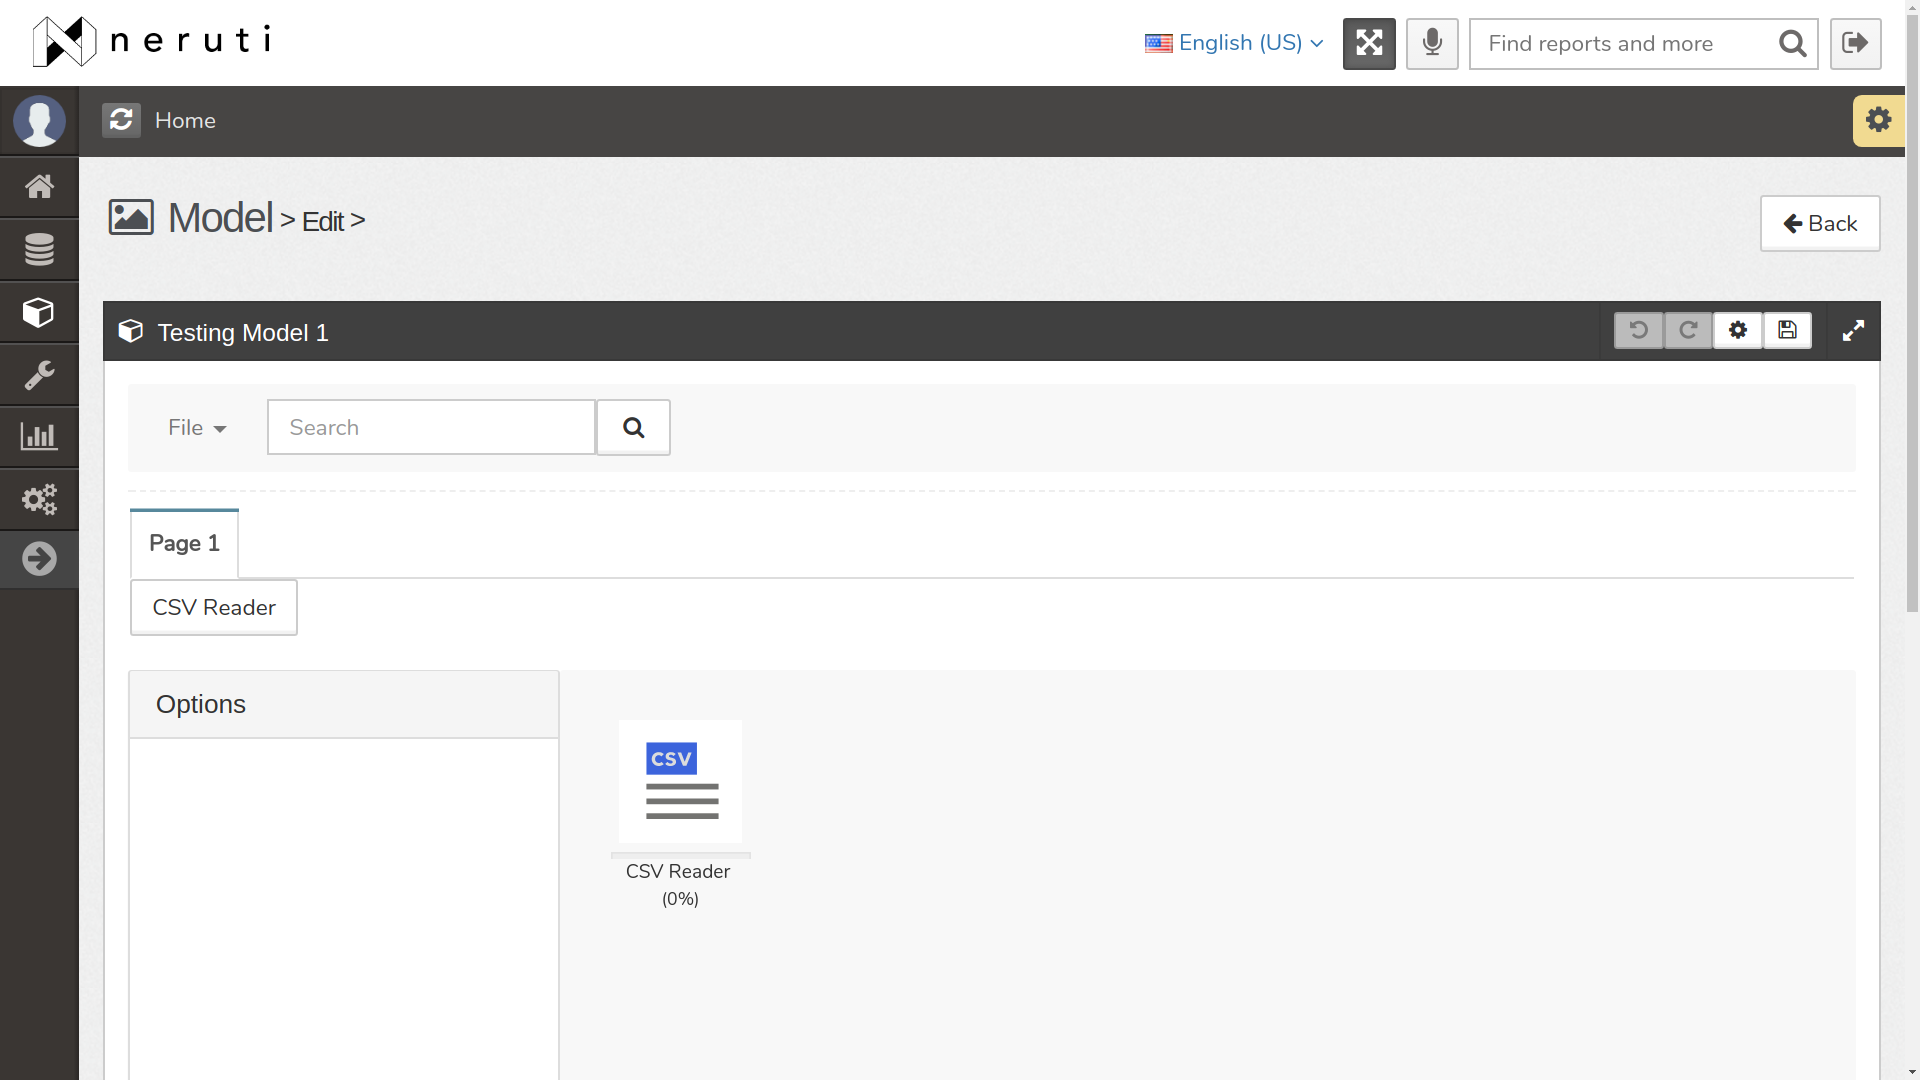
Click on Edit button to create and configure the model. The model editor will appear. It will be an empty canvas to construct model.![]()
This on Select. A dropdown list of nodes will will shown.
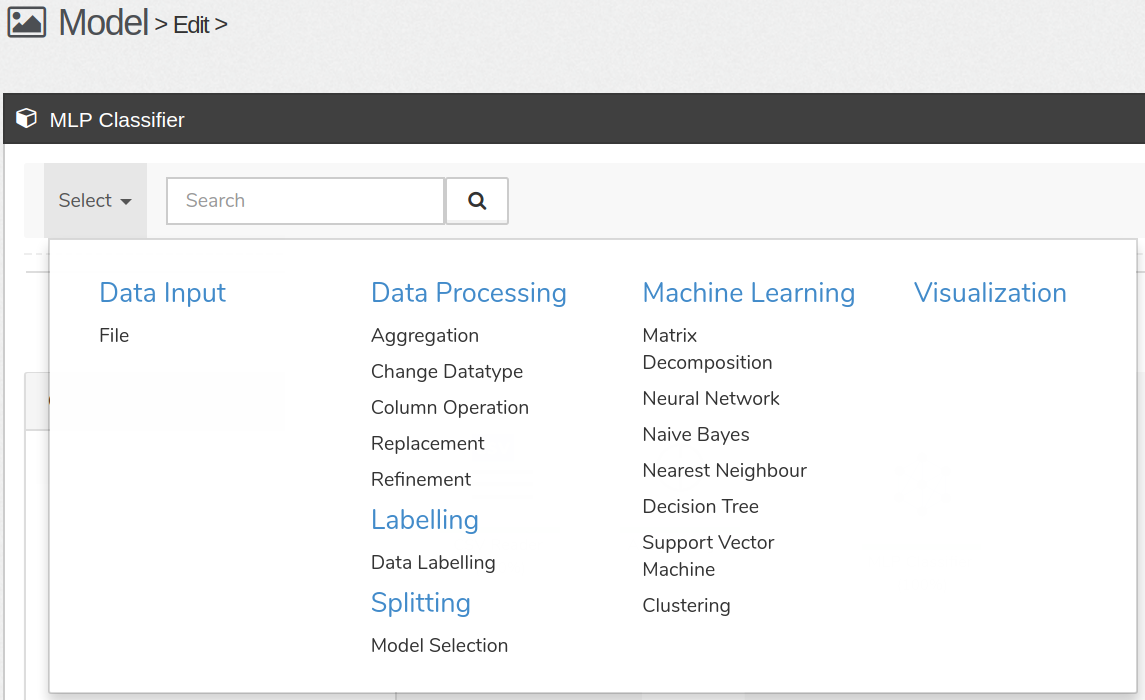
Click on any node you desired.
![]()
The above screenshot shown we had choose CSV Reader node. Click on CSV Reader tab to create an CSV Reader node in the editor as shown below:
Configure Node Options
Each node comes with default settings. Chances are you would want to customize a node's options to suit your environment.
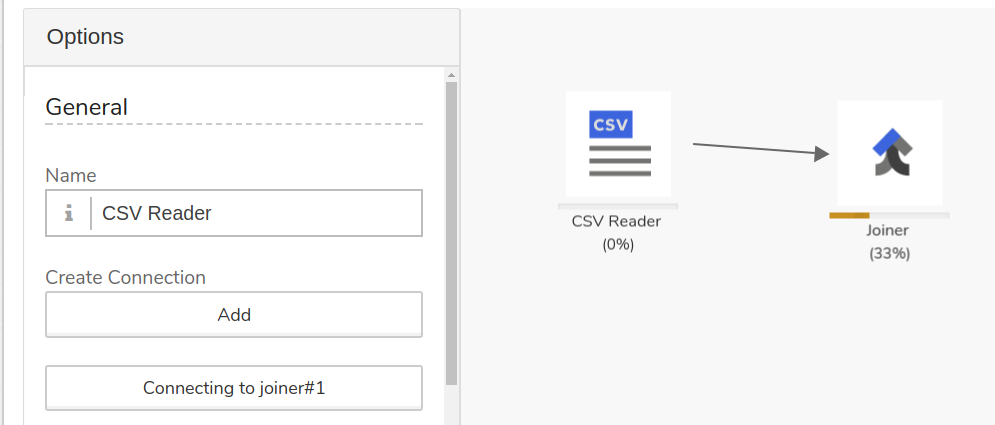
Click and highlight a node. Its options and configurable parameters will be shown in Options window.
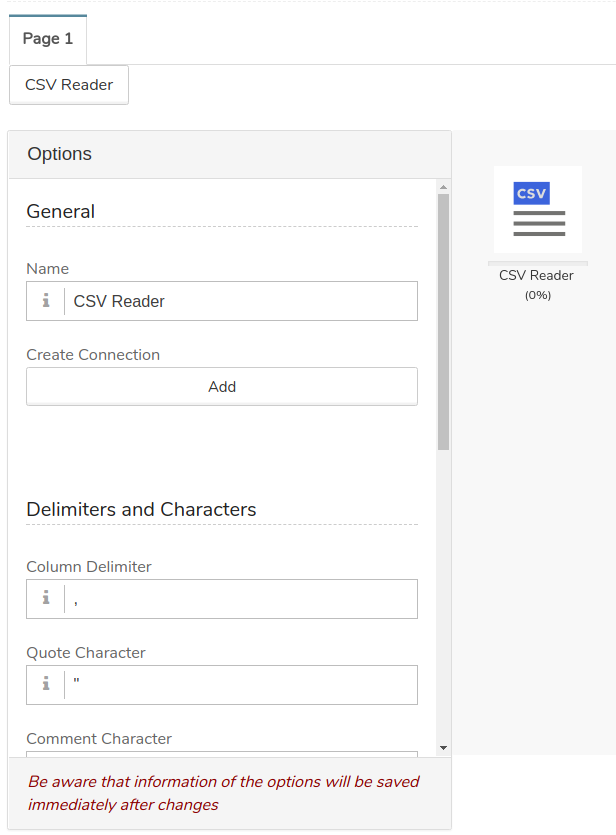
Changes on node's options will immediately take effect.
Connecting Nodes
Connecting a node to the next node means you would like to pass the output from the previous node to next next node as input. Thus you are able construct a chain of nodes each takes an input and produce an output to be consume by the next node.
Placed multiple nodes on the editor. Click on a source node to reveal its options.
Clicked on Add button to choose next node to connect to.